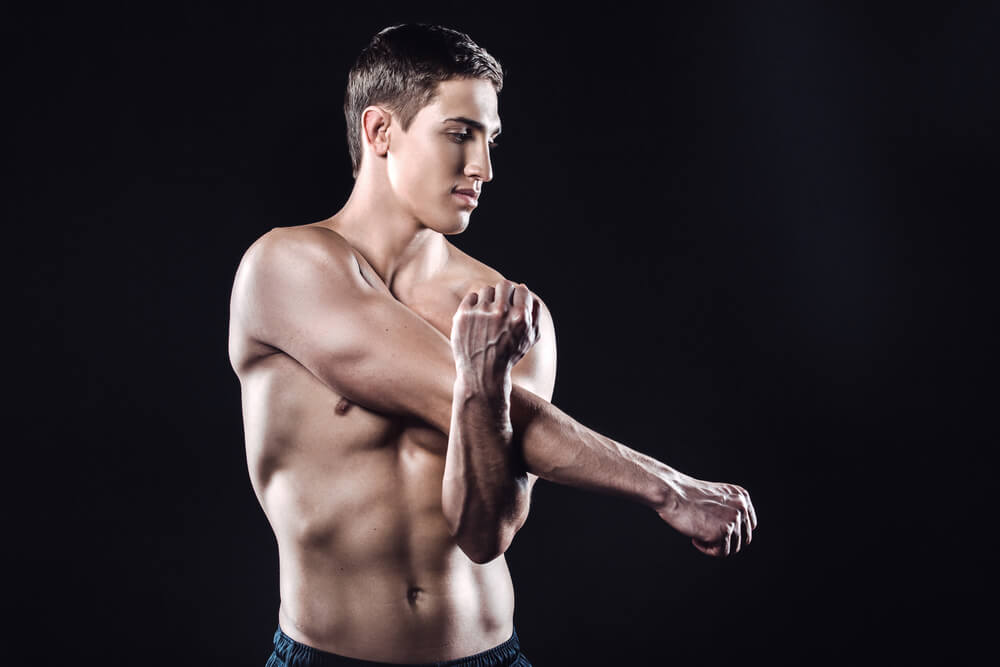
Hitting the weights and sticking to your diet are both crucial elements to making gains in the gym. But you know that already. But did you know mobility exercises can help with those gains?
Now, it doesn’t mean you need to trade in all your gym shorts for baggy hemp pants, walk around barefoot and chant Chakras while sitting in the office cubicle.
However, different mobility yoga moves can help you both make gains and improve your posture. Every muscle and bone in your body is interconnected. So if one muscle is off, it pulls other muscles out of alignment, which can lead to bone problems, nerve issues and all sorts of conditions you need to avoid.
Mobility Exercises For Your Gains In The Gym
Here are some mobility exercises that can help you make gains and, just as importantly, avoid injuries, while at the gym.
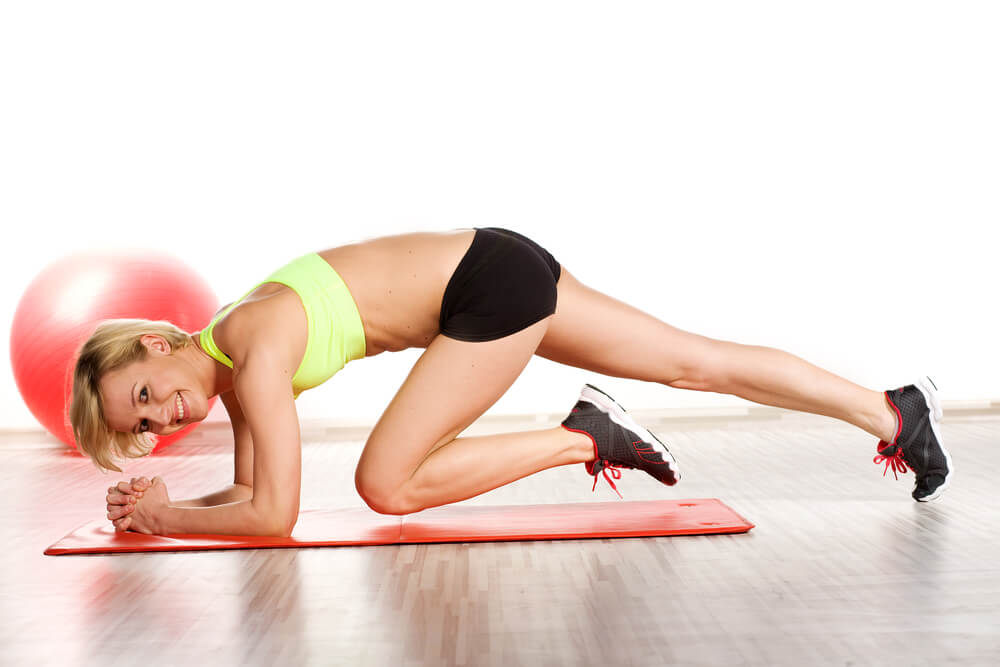
The Belly Walk
Mobility Exercises For Tight Ankles and Back
When you stop and think about it, you put a considerable amount of weight and pressure on your ankles throughout the day. It’s not just when you lift but simply walking and conducting your daily activities. So ankles are almost always tight. Tight ankles reduce not only the amount you can lift with your lower body lifts but it reduces your complete range of motion as well.
By performing this belly walk, you’ll help lighten up the ankles and even open up your upper back as well, which is great for all your upper body lifts (while reducing some back pain as well).
Many of the exercises we list here begin in a push-up position, and this is no different. So go down into your pushup position but place your hands on an elevated surface. Using a step works great for this, but if you don’t have that you can use really any sturdy surface that elevates a few inches off of the ground.
Now, while keeping your arms in the elevated position and your legs straight, begin to walk your feet up to your hands. Don’t bend your legs at all. Keep them straight throughout this move. Instead, you want to round the upper back as you step. Push each heel into the ground as you step closer to the box.
When you are no longer able to keep your legs straight you want to stop and hold this.
Keep your shoulders and hands in position and just take five deep, long breaths in and out. Now, stand up, shake it out and repeat the process another four time.
What is very important with all of these exercises is you don’t just do it once and call it a day. You need to do each the four or five times. Doing it once or twice is not going to loosen up and make the necessary corrections you need.
You should also do these several times a week at the very least (if not every day).
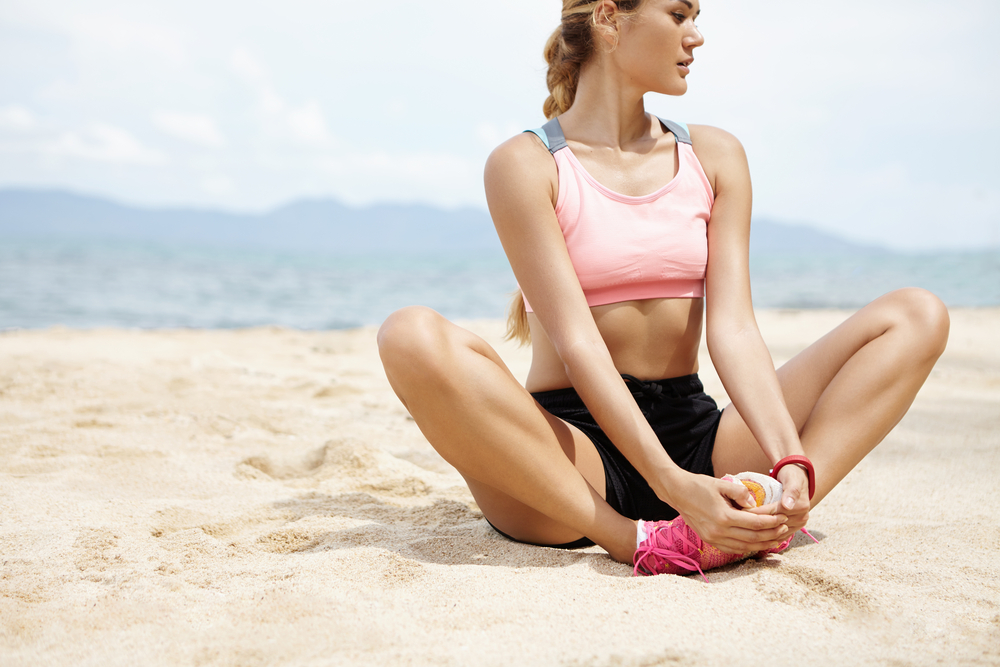
The Butterfly Stretch
For: Quads, Hamstrings, and Butt
This is a great move for opening up your entire lower body. It will also help open up the hips as well. You’ve probably done at the very least a variation of the stretch if you performed sports in high school. It is one you can do when just sitting on the floor.
Begin sitting on the floor as if you’re going to cross your legs over. Now, press the bottom of your feet together in front of you. Bring the heels of your feet into your body and as close to your groin as possible (without lifting your feet off of the ground). Now, push down and lower your protruding knees down as low as you can.
You don’t want to force everything right off the bat.
Go slow as you stretch.
You may be surprised as to just how far down you can stretch. Locate the point of the stretch where you can no longer go any further down and hold this for five long, deep breaths. Now shake yourself out and repeat this another four times.
It is very important to open up your groin muscles and this area of your body. You likely rarely stretch out these muscles, which leads to a very tight core. The tight core and groin muscles reduce your range of motion. Opening these up will not only improve your range of motion but reduce potential injury, all of which will help boost your possible gym gains.
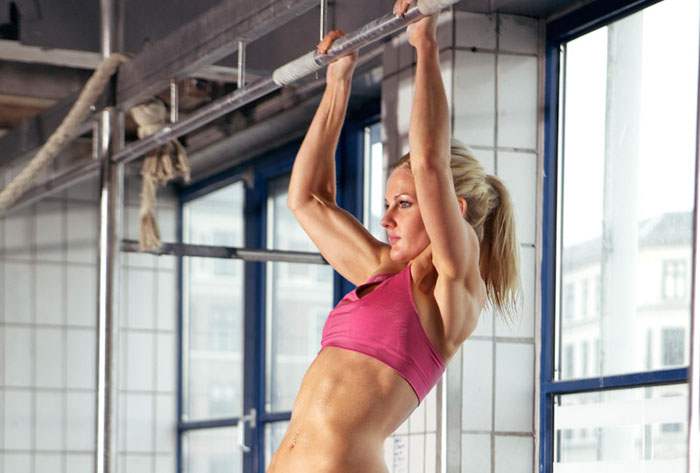
The Pull Up Bar Hang
For: Upper Back
People go in to see chiropractors all the time due to pains in their back. Now, there are many reasons as to why back pain occurs. There are problems with how back muscles (especially the stabilizing muscles in the lower portions of the back) function due to posture and movement issues.
Additionally, gravity pulls down on the body which shrinks the spine. Now, there are different ways to go about correcting this.
Getting into identifying chiropractors that actually do quality work and don’t just “crack” joints is its own article, so we’re not going to get into identifying good chiropractors here. There are those who invest in inversion tables, which really do work, but these tables can cost upwards of a few hundred dollars, which is far more than you should spend because you can do much of the same work with a pull-up bar.
With this, you might need a stool or bench. It depends on the height of the pull-up bar.
If you can reach the floor while holding on you don’t need a bench. If you can’t, you will need one.
With this exercise, you’ll grab hold of a pull-up bar, as if you were going to do a pull-up. If your feet can reach the floor, you’ll want to stretch your feet in front of you so the heels are on the floor. Don’t put any weight on the feet, but just have them touch. If you can’t touch, place the bench in front of you so you can place the heels on the bench without putting weight on your legs.
So why is having your feet touching something important?
If you hang there without the kind of anchor point your back muscles will tighten up in order to stabilize your body. The entire purpose of this move is to loosen up your back, so this wouldn’t help at all. Instead, with your feet touching, your back muscles can loosen up.
While hanging there you will very likely feel (and hear) some vertebrae pop. That is your spine starting to stretch back out. You want to take five or six deep breaths, letting the air out slowly. Take a brief rest, then repeat it another three times.
Focus on your breath when doing this move.
You want to expand your diaphragm while breathing.

The Pigeon Stretch
For: Locked Hips
The next time you’re standing in line or doing anything else on your feet for long periods of time, stop and think about how you’re standing.
Are you always standing straight or do you lean to one side, putting more of your weight on your right or left hip?
Most people will shift their weight like this. Typically it goes to the dominant side, which may feel comfortable at the time. However, by shifting your weight like this your muscles will begin to shift as well.
This causes connecting muscles to make up for this and can ultimately lock up your hips. Locked up hips will cause not only hip pain but lower back pain as well (which, depending on the situation, can cause muscles pulling down on your back and neck). So you need to open your hip muscles back up to correct this and the pigeon stretch can help.
You’re going to need a pad or something a few inches thick for this.
If you don’t have any pads at home you can take a thick book and wrap a towel around it. Now, get on all fours, then place your left knee on the pad (or makeshift pad). Move your left heel until it’s under your right hip. Now, move your right knee to meet the calf of your left leg. This will secure your left leg in its current position. Sway your hips forward to backward. Make sure to push directly through your left hip area. This will help stretch out the left side of your hip. If you want an even extra deep stretch, move down to your forearms, which brings your torso closer to the ground.
This helps correct your hips if you commonly shift your weight to your right side. If you do the opposite you’ll want to flip the movement. The stretch itself is pretty straightforward, but you’ll want to hold it for up to five minutes if possible.
If you can’t hold it for five minutes at once, break it down into five one minute stretches until you’re able to make it five minutes at one time.
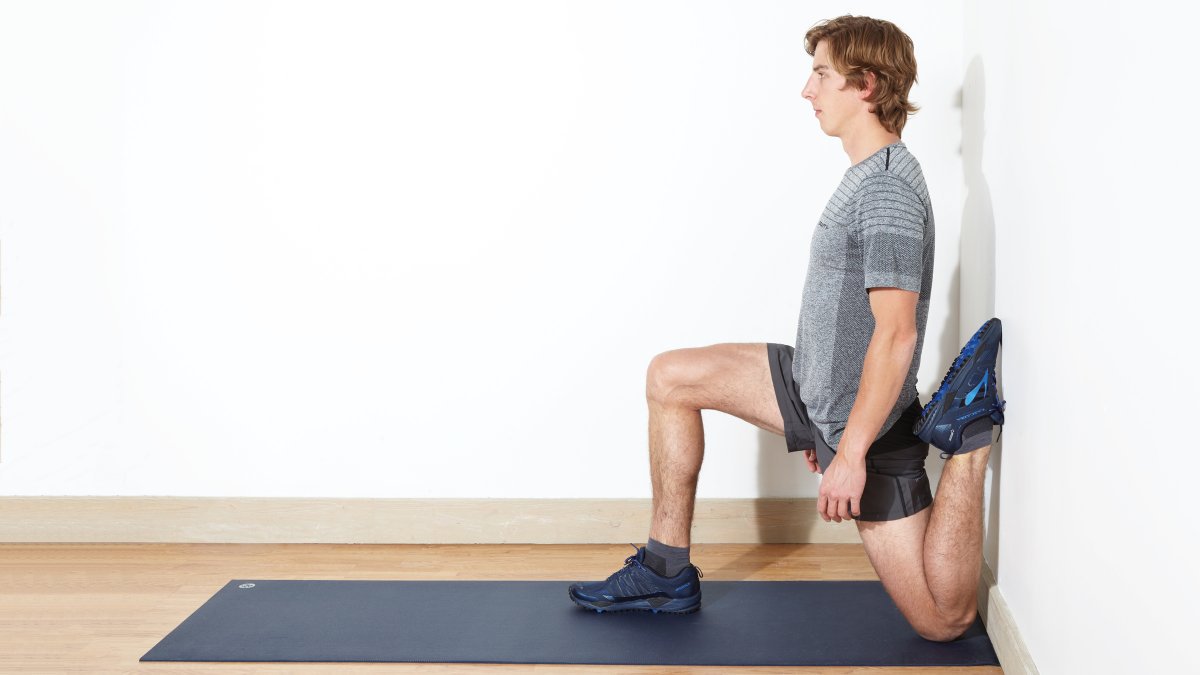
The Couch Stretch
For: Quads and Hip Flexors
Tightness in this area will kill your lower body gains. Tight quads probably aren’t going to lead to injuries while working out and it won’t feel like you’re doing something wrong when lifting, but tightness in this area reduces your movement levels, which cuts down on your ability to squat, lunge and perform other lower body moves.
Eventually, this tightness will begin to affect other areas of your body, including your knees and lower back.
This is how the body works. It starts with a small area and then begins to expand outward, so the faster you do something about this the better off you’re going to be (and the easier it becomes to fix the problem).
If you perform any kind of sports where you need an explosive jumping move (such as basketball), you really need to make sure your hip flexors and quads are not tight.
To do the move, you need to begin on all fours with your hands right under your shoulders. Position your knees on the floor so both are right under your hips. It’s best to do this on a padded surface (especially if you have any kind of knee problem). Place your feet flat against the wall (as if you’re going to push off the wall like you would while swimming). Now, lift one foot up and slide it up along the wall. Continue this until both your foot and your shin are flush against the wall.
From this position, begin to step your other leg outward. Lift your torso up in this position so it is straight with your rear quad.
You want to squeeze the hamstring for a few seconds.
Do this 20-30 times per leg. It will open up your quads and hips. Just make sure to actively engage and squeeze your leg muscles (including your butt) while performing the exercise.
![]()
Conclusion
All of these different mobility exercises are designed to correct issues that develop over time with the body. The human body is not a machine.
While incredibly complex you will develop routines and perform tasks in certain ways that cause muscles throughout your body to shift and move out of correct placement. So while each of these moves do help correct posture and pains, which in turn will help improve performance and gains in the gym, you need to take a closer look at yourself in order to determine what your own body needs.
Maybe you can do this on your own.
Maybe you need to see a specialist (such as a massage therapist) who can analyze your body makeup and point out what is out of place and what needs to be fixed.
However you go about identifying potential problem areas in the body, these moves will help take your overall physical fitness to an entirely different level.
-Terry Asher
Terry Asher
Latest posts by Terry Asher (see all)
- Better Family – Product Review Liquid Daily 2 oz - Dec 16, 2024
- Post-Workout Recovery: The Key to Optimal Performance - Nov 25, 2024
- Pre-Workout Supplements – Everything You Need To Know - Nov 18, 2024


")

[…] post Mobility Exercises Can Help You Make Gains in the Gym appeared first on Gym […]
[…] post Mobility Exercises Can Help You Make Gains in the Gym appeared first on Gym […]
[…] via- https://gymjunkies.com/mobility-exercises/ […]
Check out this program that can help with hip flexor pain and overall health
[…] It’s a good idea to keep moving every day, but you need to take your rest days. Switch up heavy workout days with light exercise days. […]
[…] It’s a good idea to keep moving every day, but you need to take your rest days. Switch up heavy workout days with light exercise days. […]