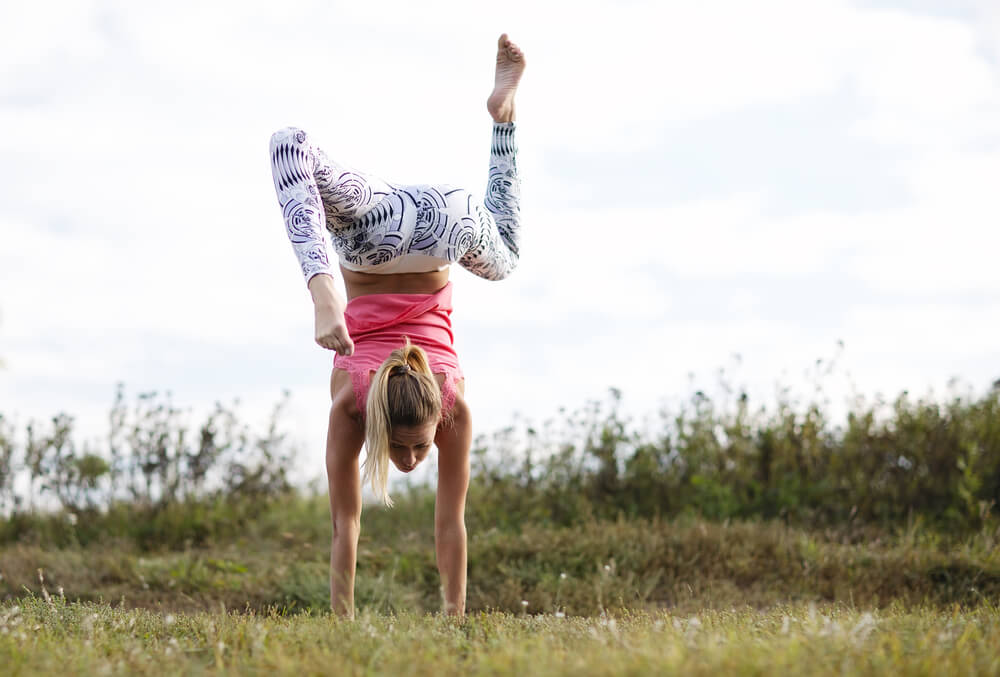
Do you want to learn how to perform handstands? This core engaging, shoulder strength building move can impress crowds and help you build a stronger body.
We’ll go over the details of how to do a handstand safely and effectively. Once you know the right technique and are ready to go up, the next key how to do hold a handstand. The last step is walking on your hands! We’ll show you how to build up to this as your strength increases.
In less than 60 days, you will be able to polish your skill and your dream of doing a handstand and looking like a pro.
Handstands: Starting Out
A lot of us think that the handstand is all about strength. However, this is a self-imposed limitation. Strength can come in handy, but it is not a mandatory thing. In order to carry out handstand, you do not need immense strength or extremely large muscles.
As with most things, the more you practice, the better you’ll get. And you’ll be building strength all along. If you want to become the master at handstands, you need to be sure that you are putting in effort every day. Devote some time every day and soon you will be able to carry out handstands more easily than you might think.
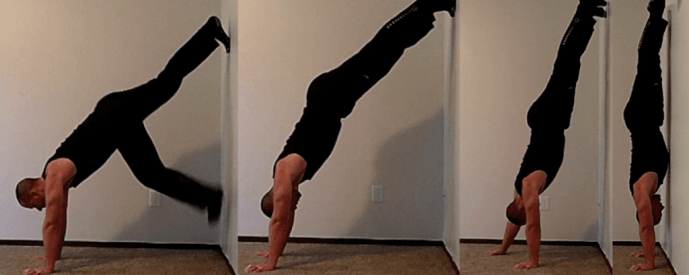
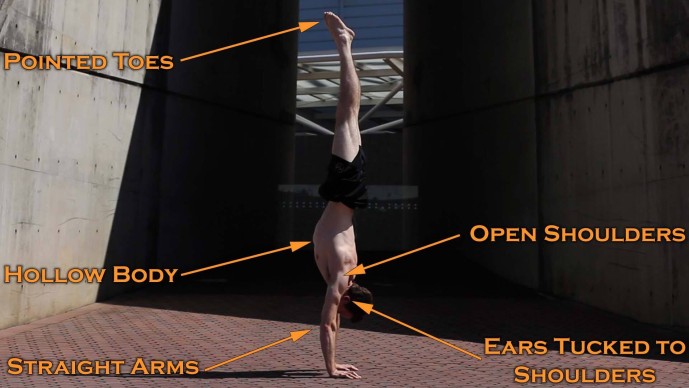
You’ll want to use a wall as a support base when you’re starting out. The first important thing to remember is to lock out your elbows and core for safety. Keep a straight spine and bet at the hips to kick your feet up over your head one at a time into the handstand. You might bounce off the wall a couple times as you try to get the hang of it, but that’s alright. Once you’re up, you’re building strength every second that you hold this position. Remember to breathe in your handstand.
Build A Good Habit
If you want to look like a pro performing a handstand, you’ll need to build the skill.
Ideally, you should set a long timeframe; like say carrying out 5 minutes of handstand practice every day for 1 month or so. Then track your progress in your workout journal. This helps build the habit of improvement.
Conquer Your Handstand Fears
Some of us have a bit of a fear of the handstand. It can be a bit scary going upside down, but with practice you’ll overcome this. Everyone starts with a beginners workout routine.
Once you overcome fear, you will find it a lot easier to focus on performing a handstand and less on getting hurt. Conquering fear comes with confidence in your form and focus on correct execution of the handstand .
Getting Comfortable with Being Upside-Down
Preparing your body for a handstand is pretty simple! You should start with a forearm plank and focus on engaging your core. When you go upside-down to perform the handstand, your core will already be warmed up. This should help you feel more in control and less shocked by being suddenly inverted. Keep on practicing this exercise everyday and soon you are going to find yourself a lot more comfortable with handstands.
Handstand Training
These steps will help you to build your strength up to performing stronger, more balanced handstands. You will become so good people will be asking you how to do a handstand.
Level 1: 60 Second Wall Plank
Get into a plank pose and place your feet on the floor very close to the wall. Now your hands should be directly under the shoulders with feet firmly on the ground. If you can keep it for a minute or so, then you can try to move your hands a little. Bring your hands closer to the wall and begin to walk your feet up the wall, while maintaining an engaged core and straight spine.
Level 2: 60 Second Wall Handstand
As you keep getting closer to the wall, you will find that the plank will begin to change in way it stresses your muscles. When your hips get above your head, you’ll feel increased strain on your shoulders. Now you’re getting close to a handstand.
Your hands should ideally come in to about 12 inches away from the wall. When you are starting out, getting closer than this might lead you to tip over. Try and stay at this position for 60 seconds before you move ahead.

Level 3: Pirouette Bail
Bailing is a skill that you must practice diligently as you’re developing your handstand skills. Once you’re able to get into a wall handstand, you should learn to safely bail. You should try to shift your complete weight on to one arm and then move the other arm. Now, your focus should be to drive one of the legs off of the wall as the opposite leg comes forward and down to the ground. Make it a point to lower your feet down safely and you’re good to go.
Level 4: Kick Up and Freestanding Control
Once you have mastered the art of bailing., you can work on your kick up to the wall and freestanding control. The kick up all comes down to commiting to the move. For this you will face the wall and lean forward onto your hands (about 3 inches from the wall). As you do this, kick on leg and then the other, bending at the hip and keeping your core engaged.
Once you can kick up and maintain a handstand from this position, it’s time to remove the training wheels (aka the wall).

How to Do A Handstand Wrap Up
The handstand is more than just a cool way to show off at the gym. This move will build your strength and balance better than most others. Remember that form first always pays off in the end. Always keep your elbows locked so you don’t come down on your head. Lastly, it’s okay if it takes some time. Very few people naturally have the ability to throw a handstand, but with this guide you’ll look like a pro.
-Terry Asher
Terry
Latest posts by Terry (see all)
- How Important Are Net Carbs For Building Huge Muscle? - Apr 28, 2017
- The Matt Damon Workout Explained - Apr 27, 2017
- Watercress – Benefits And The Best Way To Consume It - Apr 26, 2017


")
